Chapter 1: Survival essentials
This chapter will contain essential information you need to survive in this lab.
Feel free to supplement this doc. If you find some outdated content, please perform a hard reload (Ctrl/Cmd + Shift + R).
I plan to adjust the deployment mode of this website, so it may be unavailable for some time (maybe 2026/05~2026/06).

Create your own virtual machine
Create your own VM
Currently, 45.52.27.89 has PVE(Proxmox Virtual Environment) installed, which can isolate CPU and storage resources through virtualization. Each users can create independent VM instances which won't interfere with each other. Additionally, if the operating system becomes corrupted, user can maintain them via the PVE interface without affecting the host system.
Quick Start
If you have no requirements for resource isolation or distributed environments, you can directly connect to a pre-configured public machine via the below jump server. This user has root privileges and you can add users as needed.
First, generate SSH Key if none exists:
ssh-keygen -t ed25519 # Press Enter to accept default settings
If you are using ECNU campus network, you can edit
Host jumpserver
  HostName 49.52.27.89
  User jump
  Port 22

Host ubuntu-dev
  User ubuntu  # Password is eWNjc2IK
  HostName 10.10.10.102
  ProxyJump jumpserver
ssh-copy-id -i ~/.ssh/xxx.pub jumpserver # Password is ZWdndGFydAo=
Now you can login via
If you are not using the ECNU campus network, first download cloudflared (or use brew install cloudflared), then replace jumpserver in config with:
Host jumpserver
  HostName candylab.llxx.me
  User jump
  ProxyCommand cloudflared access ssh --hostname %h
This tunnel is hosted on cloudflare whose latency can be up to 300 ms. So it may be not very fluent.
Create new VM
Well, if you need to create your own VM, please read the following guide.
First, login into PVE. The username and password are
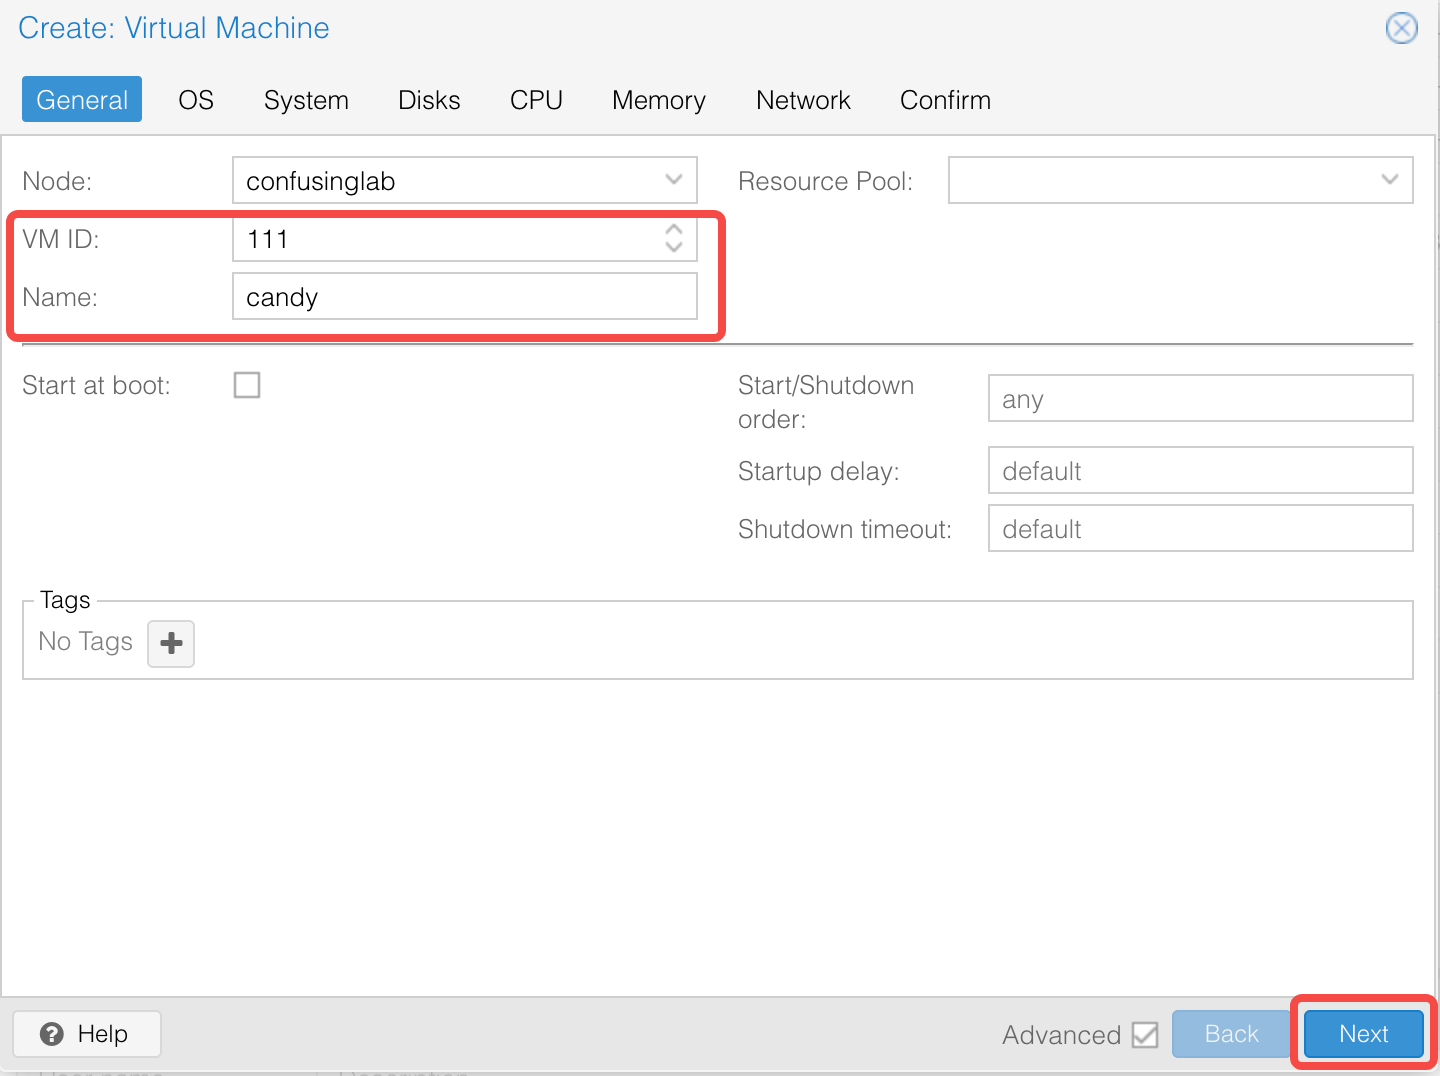
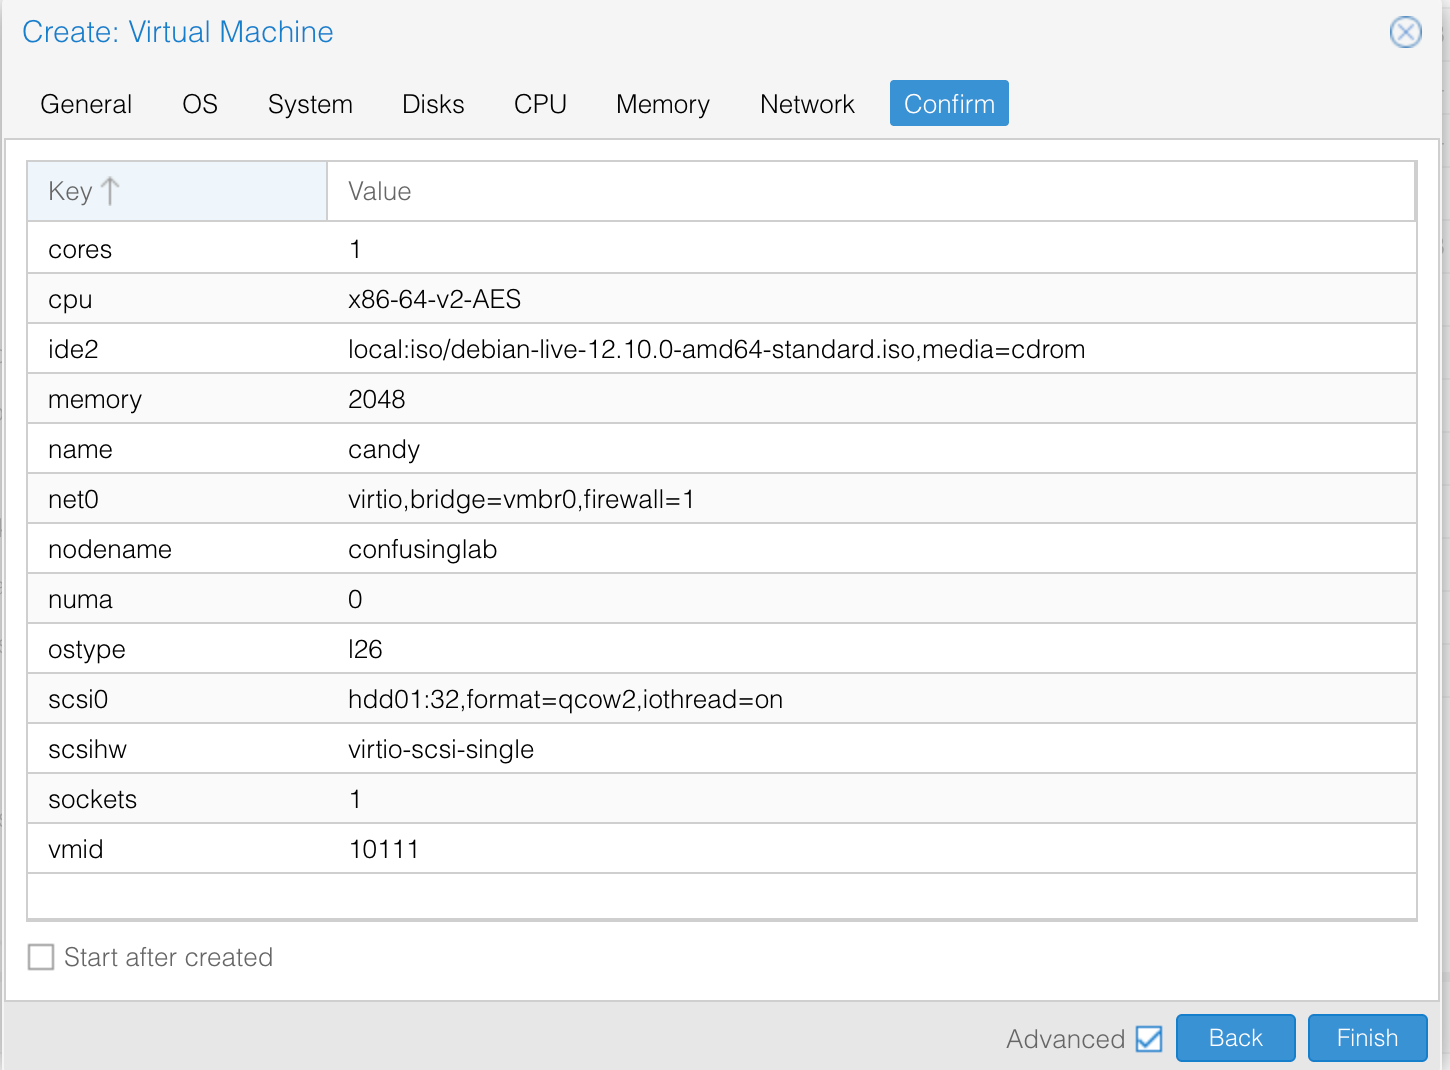
Click the "Create VM" button in the upper-right corner, set the VM ID and Name (make sure that the ID does not conflict with existing ones). Then just click "Next" to finish the creation.

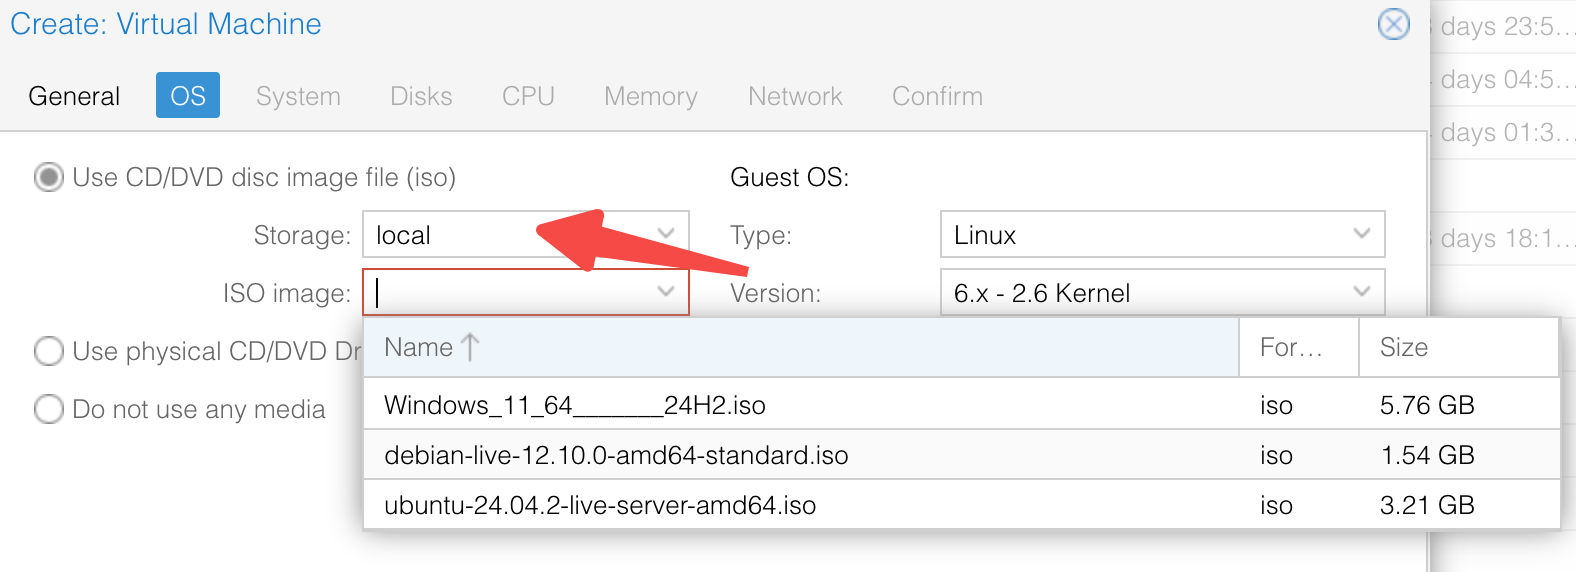
Debian and Ubuntu Server ISO images have been stored in local storage. To use other OS, upload them as you need.
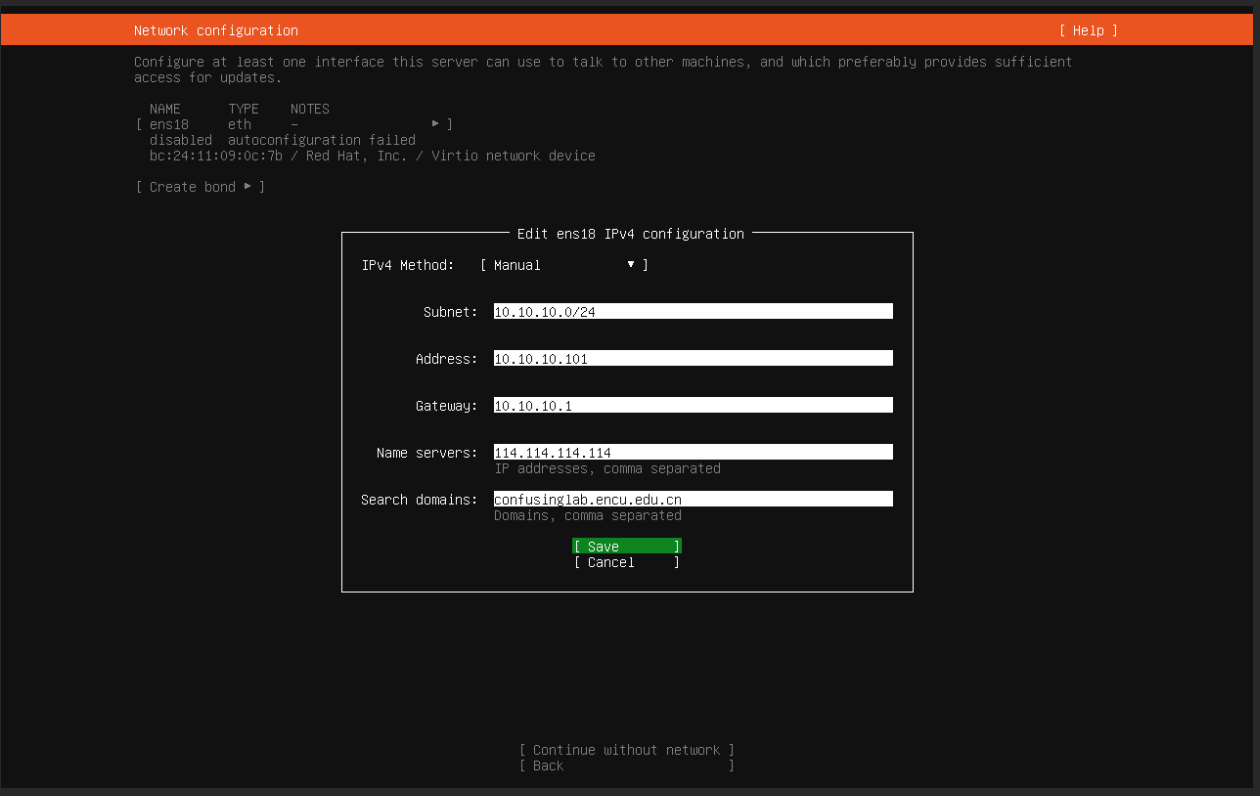
Network Setting
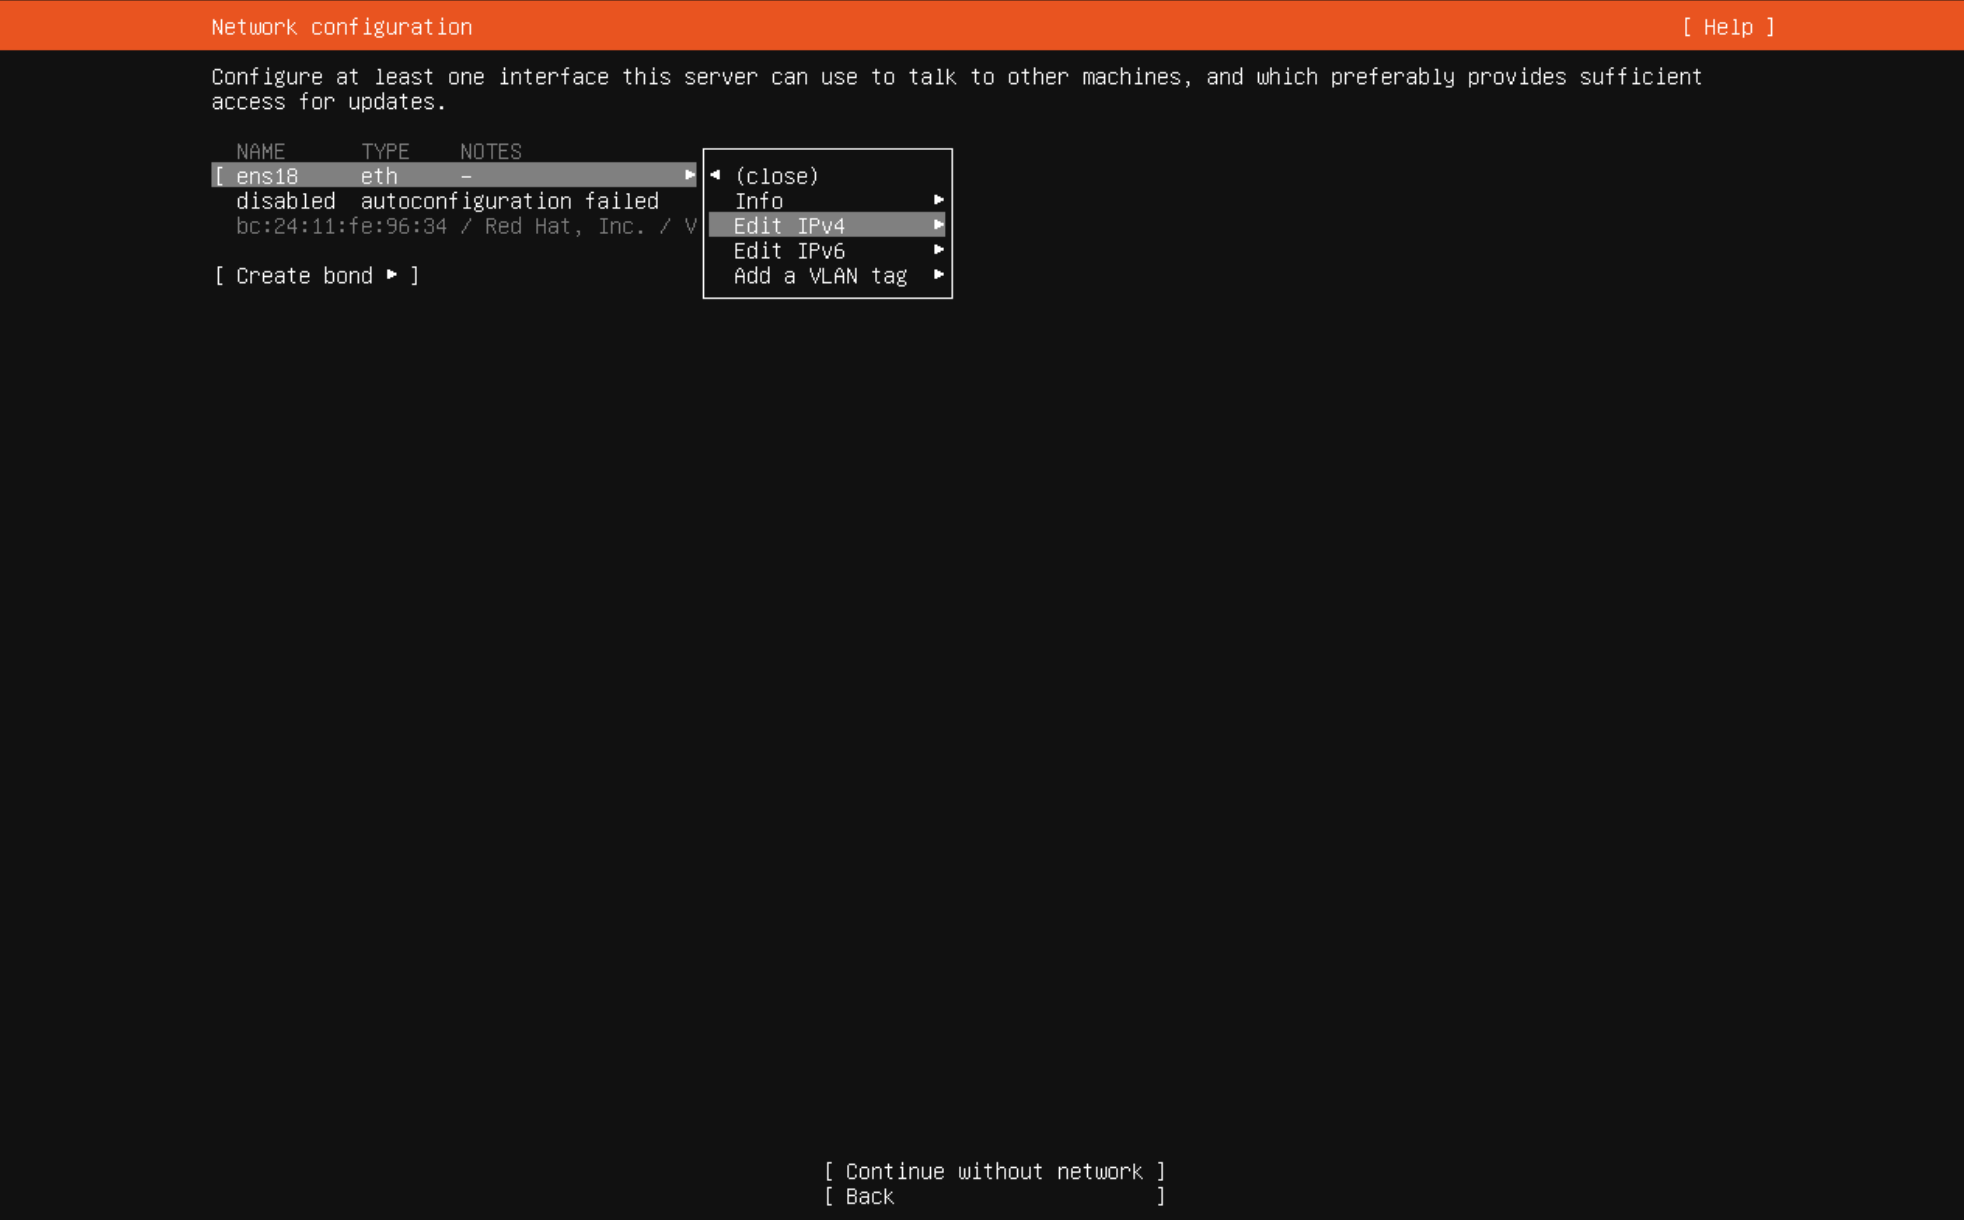
Please configure networking following these settings during installation:
- Subnet:
10.10.10.0/24 - IP Address:
10.10.10.{VM_ID} - Example: For VM ID 123 →
10.10.10.123
- Example: For VM ID 123 →
- Gateway:
10.10.10.1 - Name Server:
114.114.114.114 - Search domains:
confusinglab.ecnu.edu.cn
After that, you can also login via the same jump server, remember to change the HostName and User.
Some reminder
How to Install Programs 😵💫
When installing compiled programs in a shared environment, running
If a Makefile already exists, you can also specify the installation path using
Personally, I prefer installing programs in my
GPU Configuration
🚥 TBD
Some Learning Materials
Here I list some recommened courses you can learn.
- The Missing Semester of Your CS Education: I haven't seen this before, but I still list it here.
- Operating System: While you may have no interest in systems and want to do some AI-related works, I still strongly recommend watching this course. At the very least, it can help you understand how the programs works, right?
- mini-lsm: Build a simple key-value storage engine in a week! Written by skyzh! Using Rust! What an exciting thing!
- tiny-llm: Another project by skyzh(GOAT!), still working in progress.
- Building a Small LLM from Scratch: A new project found recently, still updating.
- 大语言模型基础:从零到一实现之路: A new course produced by nju
- CS336: Language Modeling from Scratch
Hope you can find your interests after entering the lab. Just follow the trend guys :)